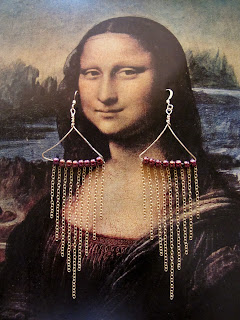
These will eventually be pendants but are still in the works.
Friday, December 30, 2011
Thursday, December 22, 2011
Thursday, December 15, 2011
Tuesday, December 6, 2011
What You Can Make Today - 12.6.11
Spurred by recent conversations with friends and coworkers who are finding their Christmas gift budgets to be smaller this year, I have decided to share ideas for nice DIY gifts. Projects range from easy to moderate levels of difficulty and time commitment.
· Project 1 – Walgreen’s Lavender Epsom Salt Soak Reinvented as Luxurious Bath Salt
o Level of difficulty and time commitment: Easy
o Materials: Empty wine bottle with screw cap or other pretty bottle with lid, milk carton or large bucket of lavender epsom salt from Walgreens, funnel (or paper to make cone to use as a funnel), ribbon
o Remove label from wine bottle. Sometimes labels (and price tags) come off easily with a blow dryer. If a blow dryer does not work, soak bottle in warm water for an hour. Peel off label and then scrape off remnants. Use the rough side of a wet soapy sponge to remove any difficult spots.
o Let bottle dry overnight to ensure the inside is completely free of water.
o Using funnel or paper cone as funnel, fill bottle with lavender epsom salt.
o If you’re feeling really creative, you could make a collage on the bottle and seal it with varnish.
o Tie a ribbon around the neck.
· Project 2 – Inexpensive Soap Disguised as Luxurious
o Level of difficulty and time commitment: Easy
o Materials: Saucer from Goodwill or other secondhand store, nice smelling soap (I usually use lavender soap from Trader Joe’s), decorative paper, ribbon
o Remove wrapper from soap (unless it looks fancy).
o Wrap soap in decorative paper.
o Wash and dry saucer. Place soap on saucer.
o Wrap ribbon around saucer and soap and tie a bow at the top of soap.
· Project 3 – Teacup Candles
o Level of difficulty and time commitment: Moderate
o Materials: Washed and dried teacups from the Goodwill or comparable secondhand store, candle making kit from Michael’s or the following items: pillar wax, wicks, a large can similar to Maxwell House or Folgers Coffee for use as a double boiler (so you don’t ruin a pan), wax dye, fragrance, thermometer, stirring utensil
o Follow instructions in candle making kit or modify instructions found in this link (I did not use wick pins or a scale). http://www.queenofdiy.com/candle-making/candle-making-101.html
o For mine, I poured wax into the teacups, waited 5 minutes and then inserted the wicks. My wicks needed to be propped up, so I laid chopsticks on top of cups on the side wick was leaning towards (pictured above). Most candle kits will recommend a second pour, as the wax will dry with an indentation around the wick. I did my second pour a half an hour after the first pour. My candles looked better prior to the second pour, so I think it’s best to make a judgment call based on how big the indentation is.
· Project 4 – Repurposed Picture Frames
o Level of difficulty and time commitment: Easy to Moderate depending on your chosen materials
o A coworker mentioned that she is making collage frames for friends. I love this idea and think you can get really creative when repurposing picture frames. Some ideas might be to make a collage of news headlines or newspaper comic strips, paint the frame with craft paint, or glue found items onto frame (buttons, beads, a pinecone, etc.).
o If you make a collage, you can seal it with varnish. If you’re really strapped for cash, you could seal the collage with clear packaging tape. If you do this, make sure to line the tape up with frame’s edges so tape is not obvious.
o Remove glass and clean with window cleaner.
o Insert photo.
· Project 5 – Ornament Gift Tags
o Level of difficulty and time commitment: Easy
o Materials: Tiny picture frame, plain paper, ribbon, or alternatively an inexpensive frame ornament (I found some in Target’s $1 bin last year)
o Write a note on the paper (e.g., Happy Holidays! Love, Megan)
o Trim paper to size of frame and insert in frame.
o Tie ribbon to nail hook on back of frame. Trim edges of ribbon at an angle for better looking results.
o Use ornament gift tag to adorn a gift or around the neck of a wine bottle.
o If you’re feeling inspired, you could decorate the frame similar to ideas in project 4.
Monday, December 5, 2011
Friday, December 2, 2011
Thursday, December 1, 2011
Monday, November 28, 2011
Wednesday, November 23, 2011
Friday, November 18, 2011
Monday, November 14, 2011
Friday, November 11, 2011
11.11.11
"A Wish for Christie Necklace" - this is for a raffle to raise funds for a friend's sister who was diagnosed with bone cancer
Thursday, November 10, 2011
11.10.11
I'm excited to make more wishbones after this one. The branch is still a work in progress. I'm neutral on the horseshoe, but it's finished and will be put on a chain soon.
Monday, November 7, 2011
Sunday, November 6, 2011
Friday, November 4, 2011
Wednesday, November 2, 2011
Monday, October 31, 2011
Sunday, October 30, 2011
Thursday, October 27, 2011
Monday, October 24, 2011
10.24.11
After being ill last week and then taking a whirlwind trip back east over the weekend for a wedding, I'm finally able to post again. Today I had some unsuccessful attempts at making napkin rings out of vintage silverware.
Monday, October 17, 2011
Sunday, October 16, 2011
Thursday, October 13, 2011
Tuesday, October 11, 2011
Monday, October 10, 2011
Saturday, October 8, 2011
Friday, October 7, 2011
Subscribe to:
Comments (Atom)


